How to execute test on real android devices
This chapter would help you understand how to execute the test on real Android Devices, after all the biggest advantage of Appium is that you can run the same test on local devices.
For test to run on devices, we need to make sure :
- USB Debugging is enabled
- ADB lists your devices into the connected devices
- Changing the Desired capability as per the hardware
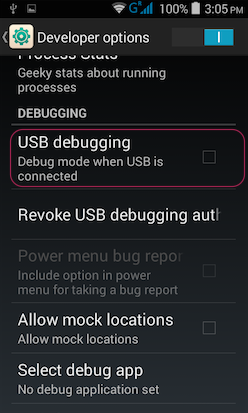
Enabling USB Debugging:
By default, Android devices do not have USB Debugging enabled, these are under Developer Options. To turn them on,
- Navigate to Settings app on phone
- Scroll down and click on the Developer Options
- Turn on the Developer Options and click the USB Debugging.
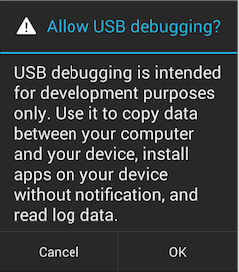
On the pop up (shown below), click on Ok.
Some devices do not have “Developer Options” and hence the way to enable Debugging mode is to launch the Settings screen. Once done, tap “About Phone" and then scroll to the bottom and tap on "Build Number" 7 times (Yes 7 times)!
Once done, you will now be able to enable/disable it whenever you desire by going to
Settings -> Developer Options -> Debugging -> USB debugging
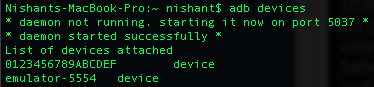
Once the above set ups are done, launch Terminal (or Command Prompt) and type in
adb devices
On a happy path, it would show the below result.
There are times when even after starting USB mode on your device, adb wouldn’t list the device here. To fix that, below are some of the steps you need to follow:
- Open the USB manager on your laptop.
- Use the vendor id (highlighted in blue below) and update in the adb_usb.ini file.
- Steps for MAC OS X to open the USB Manager:
- Click on the Apple icon on top left of the screen
- Click on “About This Mac”
- On the pop up, click on the System Report
- Under Hardware section, click on USB
- You would notice the device connected there, click on the device.
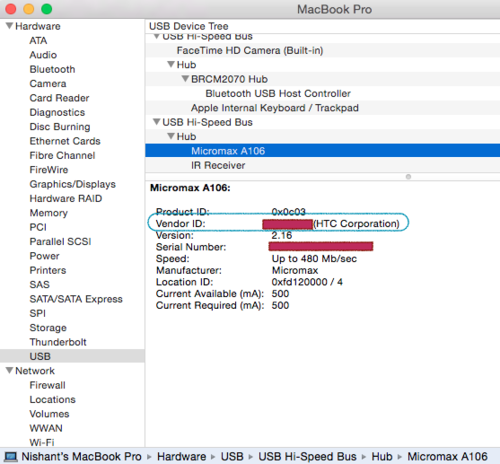
Once you have copied the vendor ID, we need to update the file below using the following command:
vim ~/.android/adb_usb.ini
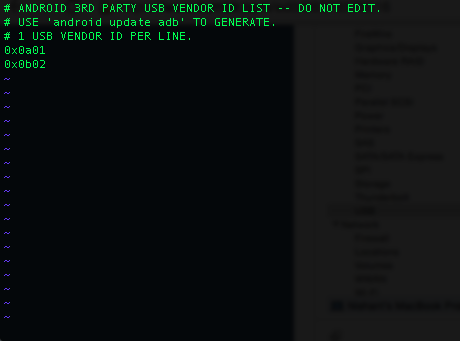
This is how a sample file would look like after updating the Vendor ID.
Once the above changes are done, run the following commands:
adb kill-server
adb start-server
adb devices
This would finally show up the devices as connected. Once the device shows up as online, we are good to run the test.
Start the Appium and in that launch the Android Server.
In case you have any android version mentioned in your code, you can remove it and have only the one, which are mandatory. Below is a sample snippet I have used and works flawlessly.
File appDir = new File(“/Users/Steve/Development/SampleApps”);
File app = new File(appDir, “Flipkart.apk”);
DesiredCapabilities capabilities = new DesiredCapabilities();
capabilities.setCapability(“device”,”Android”);
//mandatory capabilities
capabilities.setCapability(“deviceName”,”Android”);
capabilities.setCapability(“platformName”,”Android”);
capabilities.setCapability("udid", Properties.udid);

//other caps
capabilities.setCapability(“app”, app.getAbsolutePath());
driver = new RemoteWebDriver(new URL(“http://127.0.0.1:4723/wd/hub”), capabilities);